Last Updated on June 8, 2023 by Georgie Smith
As a woodworker, you already know that wood is the most versatile material. You can use it in any form and join it together in many ways. However, to make your projects spectacular, you need to know how to choose the best wood planer.
As the name suggests, a wood planer is best for making plane boards and even their thickness. A planer does the work of equally the thickness of a board. It also makes their surfaces completely flat. They are therefore great with platforms that allow them to adjust their thickness quickly and accurately.
Here are a couple of benefits you get from using these tools:
- They save you much money since you will not have to buy wood for all your projects
- This process ensures you get the wood exactly how you need it
- You can reclaim the logs by merely flattening the surfaces
This article will compare three of the best planers on the market and tell you the features that make them so great. We will also discuss the different ways you can use a planer to make your work projects better.
Accounts
Free Trial
Projects
SSL
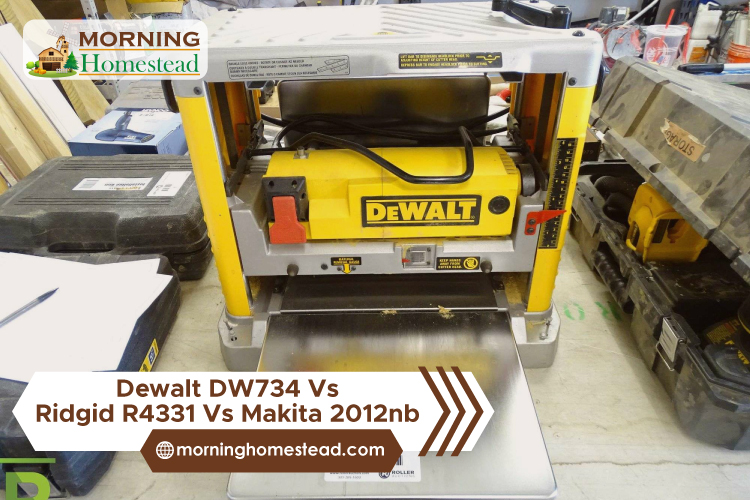
DEWALT DW734

3-blade cutter-head
Four-column carriage lock
Highly portable design
102dB
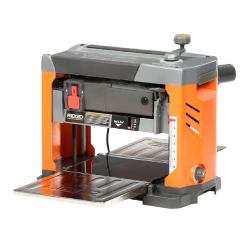
Ridgid ZRR4331
3-blade cutter-head
Steel top with glides table
High voltage motor operation
100dB
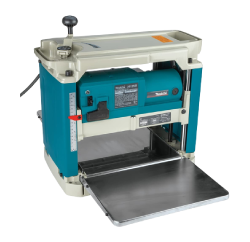
Makita 2012NB
3-blade cutter-head
Low noise operation for comfort
Fully adjustable depth cuts
83dB
DEWALT DW734 15 Amp 12-1/2-Inch Benchtop Planer
Getting the right planer for your work takes lots of observation and determination. However, DEWALT ensures to save you from all the hustles by introducing the DEWALT DW734 15 Benchtop Planer. It has a three-knife cutter head for accurate deep cuts.
The planer also has a powerful 15 Amp motor, which delivers at least 10,000 RMP. It also features extra long feed tables to ensure your material has reliable support for smooth cutting. The table also allows you to adjust the equipment to different levels for easy designing too.
Additionally, the planer features disposable and reversible knives, which makes it easy to custom stock and create clean. The large size makes it ideal and suitable for big projects. With this planer at hand, you will experience convenience at your workshop. To minimize snipe, the planer has a four-column carriage that locks drastically to reduce movement.
The planer is highly portable, and it ensures you can take it with you where the job is. It has a convenient design with sturdy material to make it durable and an all-time reliable tool.
Good Stuff
Bad Stuff

Ridgid ZRR4331 15 Amp 13 in. Bench Planer with 3-Blade Cutterhead
If you are looking for a reliable planer that will bring a difference to your workshop, then all you need is to stock this 3-blade bench planer from Ridgid. It features a comprehensive table that accommodates even large materials. Therefore, it will not limit you from designing anything you intend to make.
The Ridgid bench planer has a 3-blade cutter head, and this makes it easy for you to change your knives regarding the material you are cutting. Additionally, the blades have dual-edge making it convenient for reverse cutting too. This blade design ensures to saves you time even when cutting through large materials. The blades are also adjustable and feature self-aligning technology. That in return gives you enough time to concentrate on the material and design you are cutting.
All three blades give you different cuts all the time. Therefore, it allows you to make the right designs in the comfort of your workshop. The planer has ergonomic handles that guarantee your satisfaction as you work.
Good Stuff
Bad Stuff

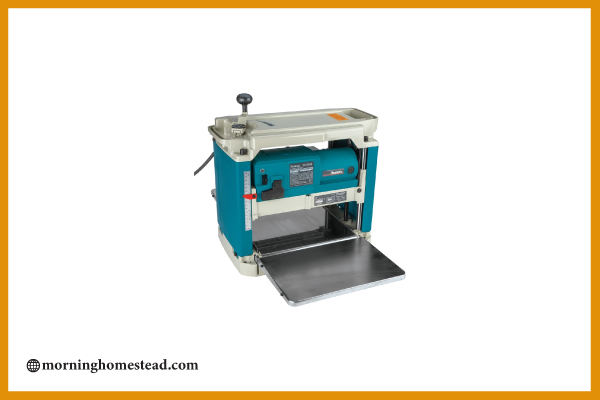
Makita 2012NB 12-Inch Planer with Interna-Lok Automated Head Clamp
The best thing about this planer is that it is highly portable. In other words, when you have heavy and large materials far from your workshop, you can always get the machines right where they are. It has an automatic head clamp, which ensures the elimination of snipes.
It has a magnetic holder that keeps the material in place for accurate cuts all the time. Additionally, it has a compact design with quiet operation. With this planer, changing blades is quite easy it also provides you with at least 17,000 cuts per minute.
Good Stuff
Bad Stuff
Comparison Table
| Features | DEWALT DW734 | Ridgid ZRR4331 | Makita 2012NB |
|---|---|---|---|
| Blade design | 3-blade cutter-head | 3-blade cutter-head | 3-blade cutter-head |
| Table size | 12-1/2” wide table support | 13” wide table support | 12” wide table support |
| Blade type | Disposable and reversible knives | Dual edge knives | Reversible disposable knives |
| Noise level (in decibels) | 102dB | 100dB | 83dB |
Benchtop Planer Vs. Hand Planer:
| Benchtop Planer | Hand Planer |
|---|---|
| Works like a big industrial thickness planer. It can work on wood that are as wide as 20 inches. | Is only suited for smaller jobs |
| It is not as portable as most people would want | Can get moved from one place to another easily. |
| Great for professionals | Only suitable for small-scale DIY projects |
Which Planer Thicknesser?
As an individual that works with wood, you cannot afford to downplay the importance of quality power tools. The thing about this tool is if you make a seemingly simple mistake on quality, it will fall apart sooner than you thought. If this happens, it will not give you the quality you desire. [1]
It is, therefore, necessary to take your time and make the right choice. Here are a few things to ensure that you get the right features for your tasks:
Motor and Power
Power is the most critical factor to consider when buying a planner. It is therefore vital for you to get a high-quality and powerful motor for the job. If you plane materials like softwood, then any motor you buy will get the work done.
However, if you are working on a stronger type of wood, make sure that you choose a planer that will not strain your back. Instead, pick one that will work on the type of projects you do and nothing any more powerful.
Therefore, ensure you check the specifications so that you do not end up with a tool that will not be of much help.
The power gets measured in rpm. The last speed you need to ensure your benchtop planer works adequately is 8000rpm. Anything less than this will not be powerful enough for most projects.
The Cutter Head
It is yet another part that you must ensure you check carefully. The cutter head you buy will determine the finishing you will get. It will also affect the amount of noise produced as you work. There are two types of cutter heads to choose from straight knives and helical cutter heads.
Helical cutter heads are carbide and therefore more difficult to sharpen. However, on the bright side, they maintain their sharpness for a more extended period. Straight knife cutter heads are easier and cheaper to feed to the board. They are also easier to sharpen, but they do not maintain their sharpness for a long time.
You can always change the cutter head in the future. Alternatively, you can choose to have both cutter heads for times when you need both. However, remember, if you change it to one that the manufacturer does not recommend that will void its warranty.
*Helpful Tip*
Veterans recommend that beginners use a straight knife cutter head.
Replacement Parts
Your planer will get old. What will you do then? It is necessary for you to ensure that you can find replacement parts easily. Some brands do not come with replacement parts. Therefore if the tool gets old, you will have to buy a new one. With parts, you will not buy the entire device just the faulty parts which are often cheaper.
Capacity
You also need to consider the size of the lumber that the planer can plan. It should be plane wood that is at least 11 inches wide and six inches thick. It is not advisable to go for anything less than this figure.
Design
No child play gets involved in planning lumber. There is often much vibration and shaking. You, therefore, need to ensure that your tool is sturdy and rigid enough to handle these vibrations. You also need to be sure that both you and those in your workshop are safe. A substantial cast base keeps the tool stable and safe for use.
Precision In-Depth Adjustments
Adjusting the depth should not be an issue. There should be linear scales and accurate gauges and precise guidelines that will ensure you do it correctly.
Price and Performance
These two are often directly proportional. The planer should give you a smooth surface and save you time. The better the quality, the more you will have to pay. However, do not get duped into buying something that is not as valuable as advertised. Always read the customer reviews, so you know what to expect regarding performance and price.
Edge Jointing with A Thickness Planer
All you need for edge jointing with thickness is a three-piece jig. You can use a melamine-faced particle board to make the sidewalls and the base of the jig since it keeps it flat and smooth. Ensure that both sides of the wood get clamped and that you adjust the thickness of the stock. The planer table is both outfeed and infeed sides. The walls of the jig will form a tuner through the planer where you can keep small boards standing correctly as you feed them through.
Quick Thickness Planer Hacks
When you need to smooth boards and get them to a precise thickness, nothing beats the good old wood planer. Here are some tips that will help you solve most of the problems including ridges, tear-outs, and snipes. We also include a few techniques that will come in handy for those special projects.
To Avoid Tear Outs:
Always remember the correct way to feed the board to the device. Often this involves ensuring that the head cuts along the grain of the wood.
A huge mistake most people make is feeding the board so that it gets cut against the grain. This act causes the head to catch the grain, and that causes tear outs.
Tear-outs are capable of ruining expensive wood lumber. They often occur when you feed the wrong end of the wood to the planer. The knives will catch the wood fiber and tear them out rather than cut them.
You can quickly tell the right side to feed the lumber by checking the direction of the grain fibers. If you are working with rough lumber, you can determine the course of the fiber by running your hand through the wood. It will be smooth in one direction and rough in the other. Let the horizontal direction get fed forward to the planer.
When the wood you are working with gets tears on both sides, ensure that you take small pieces of wood at a time for best results and minimal loss.
Plane Perfect Deck Supplies
Nothing jazzes up a rail quicker than the custom-planes spindles. If you are learning how to use your planer, rough-cutting 2X2s into crisp and clean spindles is a great place to start. Use the more extensive 2×4 lumber to make these cuts. They ensure that you get great-looking spindles that are crisp and come with square edges.
It will give you the freedom to remove the saw marks and still have that 1-1/2 thickness woodworkers crave.
The best way to do this is to remove about 1/32 inches and run the 2X2s through the device. Then reset it and remove the same size to form the opposite side. Only when the thickness and width are the same, rotate the spindle and the plane to adjacent faces. Always stack the spindles, so you know which sides you have already worked.
Reclaim Old Wood
The best thing about a planer is that it gives you the freedom to repurpose the wood. First, always ensure that you have removed all grit and metal before planning the lumber. An encounter with nail risks ruining your planer.
Clean the salvaged lumber with numerous shallow passes. With each pass, ensure that you remove about 1/16 inches and 1/32 inches until you reach fresh wood or get the thickness you require.
*Helpful Tip*
You can reuse any wood regardless of how old it looks from the outside.
Stopping Snipe
Snipe is the shallow gouge that occurs at the end and beginning of aboard. The movement of the planer causes them as it enters and leaves the lumber.
To minimize snipe, leave an extra 5 inches of the length of the boards you are working. You will then have the freedom to cut off the snipe when you are done working on the wood.
You can also choose to feed in a “sacrificial” board. The next boards will be treated as part of the board so the snipe will only be on the first and last boards. The planner will handle them as one long board.
Cleaning the Edges
Stack the boards side by side to remove saw marks and avoid tear-outs.
Sand the Ridges
Sand out the ridges using a nicked planer knife. You may use 120-grit sandpaper. Always remember to sand along the grain.
Planer Safety
- Wear a dust mask, glasses, and hearing protection
- Never put your hands near the cutting area
- Do not wear loose clothes that may catch in the knives or rollers
- Unplug the device once you finish working
- Ensure that you switched it off before you plug it in
FAQs:
Q: Why should I own a planner?
A:
- Increases the quality of your project
- Allows you to work on a variety of projects
- Reduces the costs of lumber
Q: What should I check before I start my machine?
A:
- Check whether there are proper depth and clearance of the knives
- Are the fences appropriately anchored?
- Ensure all parts get suitably lubricated
- Ensure it gets switched off before you plug it in
Q: What Type of Wood Should I Use With my Planer?
A: You can use all types of wood. Whether fresh or old, you will get excellent results as long as you know how to use the device.
Conclusion
Choosing the best thickness planer depends on what you need. Each person’s preferences will vary depending on what they want to achieve and how often they use the tool. You will also get more longevity if you buy from a great manufacturer. You, therefore, need to do thorough research and ensure you make the right choice.
Did you enjoy this article? Share it with your friends on social media. Help them find the right tips for using their planers.

